
The BCHQ had a 360° view of the three runways of RAF Ibsley, being a defence towards any potential invasion. Armed with two Lewis AA guns and surrounding trenches with an unusual extension of a second cupola. Located East of the control tower and a km away from the HQ, Moyles Court house. The Battle Command HQ held a manned crew of around four officers and a group of airmen and runners (for if telephone lines were damaged).

The Battle Command Headquarters:
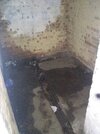
Office space:

Steps leading to cupola
View from cupola
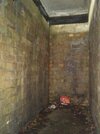
Inside Air raid shelter next to airfield:
Shelter entrance:
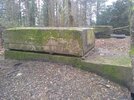
BCHQ escape hatch:
Air raid protection next to Moyles HQ:

One of three trenches on the hill:

One of two AA placements:
BCHQ entrance
The Battle Command Headquarters:
Office space:
Steps leading to cupola
View from cupola
Inside Air raid shelter next to airfield:
Shelter entrance:
BCHQ escape hatch:
Air raid protection next to Moyles HQ:
One of three trenches on the hill:
One of two AA placements:
BCHQ entrance

 Title needs county & date of explore though. Just for next time really.
")